
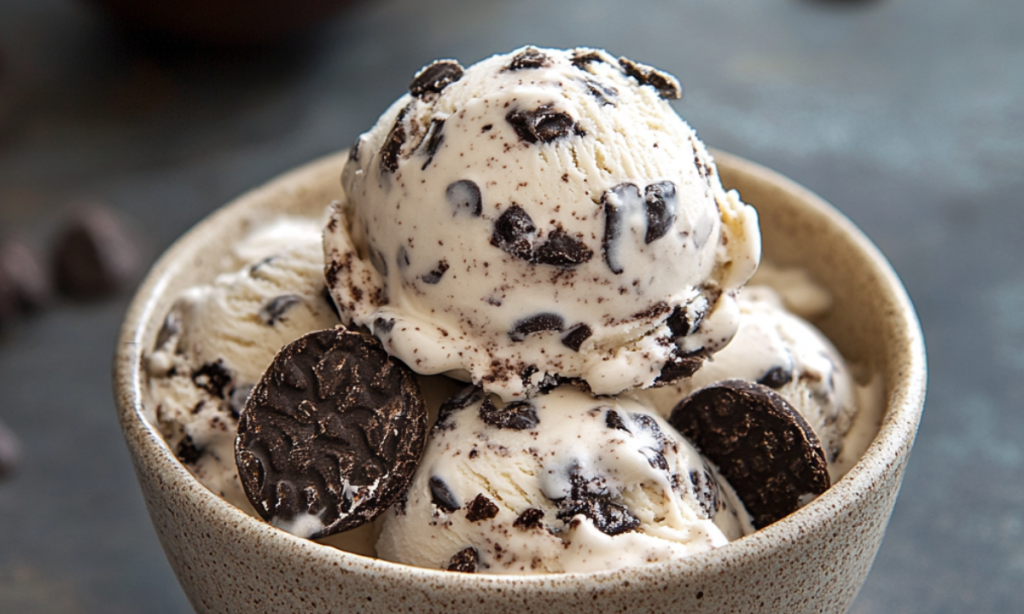
Cookies ‘n Cream Ice Cream is a timeless favorite that combines the rich, creamy texture of vanilla ice cream with the satisfying crunch of chocolate sandwich cookies, often Oreos. This flavor has become a staple in ice cream parlors and freezers around the world, loved by both kids and adults alike. But what makes this flavor so irresistible, and how can you recreate it perfectly at home?
In this guide, we’ll explore the history of Cookies ‘n Cream Ice Cream, dive into a step-by-step recipe, and provide tips, variations, and FAQs to ensure your homemade version is as delicious as the store-bought kind. Plus, we’ll explore some fun twists on this classic treat that you can try at home (Serious Eats) (Recipe Girl).
The History of Cookies ‘n Cream Ice Cream
The Cookies ‘n Cream flavor first emerged in the late 20th century, becoming a favorite almost overnight. Some credit the flavor’s invention to the staff at a dairy plant in South Dakota, while others believe it was first concocted in a university’s food science lab. Regardless of its exact origins, what’s clear is that Cookies ‘n Cream quickly became a hit, with major ice cream brands like Breyers and Ben & Jerry’s adding it to their lineups.
This flavor’s rise to fame was no accident. The combination of crunchy chocolate cookies and smooth, creamy vanilla ice cream was an instant success, providing a perfect balance of textures and flavors that appealed to a wide range of palates (Recipe Girl).
Ingredients Overview
Creating the perfect Cookies ‘n Cream Ice Cream starts with selecting the right ingredients:
- Base Ingredients:
- The key to a rich and creamy base is using high-quality dairy products like whole milk and heavy cream. These ingredients create the luxurious texture that makes this ice cream so indulgent.
- Egg yolks are essential for creating a custard-like consistency that holds up well when frozen.
- Sweeteners like granulated sugar are necessary to balance the flavor and ensure a smooth texture.
- Cookies:
- Oreo cookies are the classic choice for this ice cream. Their blend of crunchy chocolate cookies and sweet cream filling is the perfect complement to the vanilla base.
- For those looking for a twist, other chocolate sandwich cookies or even homemade versions can be used to add a personal touch.
- Flavor Enhancers:
- Vanilla extract is crucial for bringing out the sweetness and depth of the cream base. A pinch of salt can also enhance the overall flavor, balancing the sweetness of the cookies and cream (Recipe Girl).
Step-by-Step Recipe Guide
Making the Ice Cream Base
- Heat the Dairy: In a medium saucepan, gently heat whole milk and heavy cream until just simmering.
- Whisk the Egg Yolks: In a separate bowl, whisk together egg yolks and sugar until thickened. Gradually add the hot milk mixture to the egg yolks, whisking constantly to temper the eggs without scrambling them.
- Cook the Custard: Return the mixture to the saucepan and cook over medium heat, stirring constantly, until it thickens and coats the back of a spoon. Do not let it boil.
- Cool the Mixture: Strain the custard through a fine sieve into a large bowl. Stir in vanilla extract and let it cool to room temperature. Refrigerate the mixture for at least 4 hours or overnight for the best results.
Preparing the Cookies
- Crush the Cookies: While the custard is chilling, crush Oreo cookies into various sizes. Some should be finely ground, while others should be left in larger chunks for added texture.
- Chill the Cookies: Place the crushed cookies in the freezer to keep them crisp until they are ready to be mixed into the ice cream.
Churning the Ice Cream
- Churn the Ice Cream: Pour the chilled custard into an ice cream maker and churn according to the manufacturer’s instructions.
- Mix in the Cookies: Once the ice cream reaches a soft-serve consistency, gently fold in the crushed cookies until evenly distributed.
Final Assembly
- Freeze the Ice Cream: Transfer the ice cream to an airtight container, cover with plastic wrap, and freeze for at least 4 hours or until firm.
- Serve and Enjoy: Scoop and serve your homemade Cookies ‘n Cream Ice Cream, perhaps with a drizzle of chocolate syrup or extra cookie crumbles on top (Serious Eats).
Nutritional Information and Health Considerations
Cookies ‘n Cream Ice Cream is a rich and indulgent dessert. A standard serving contains approximately 250-300 calories, with significant amounts of fat and sugar. While it’s a treat best enjoyed in moderation, there are ways to make lighter versions:
- Low-Fat Dairy: Use low-fat milk and cream to reduce the fat content without sacrificing too much creaminess.
- Sugar Substitutes: For a lower-sugar version, consider using sweeteners like erythritol or stevia (Encyclopedia Britannica).
Variations of Cookies ‘n Cream Ice Cream
This classic ice cream flavor can be customized in numerous ways:
- Gluten-Free Version: Substitute regular Oreos with gluten-free chocolate sandwich cookies.
- Vegan/Dairy-Free Option: Use coconut milk or almond milk as a base, and select dairy-free cookies.
- Low-Sugar or Keto Variations: Opt for sugar substitutes and low-carb cookies to create a keto-friendly version.
- Creative Twists: Add mint extract for a minty version, or mix in peanut butter for an extra layer of flavor (Serious Eats) (Recipe Girl).
Serving Suggestions
Cookies ‘n Cream Ice Cream is versatile and can be served in many ways:
- Pair it with Brownies: The rich chocolate flavor of brownies complements the creaminess of the ice cream perfectly.
- Top with Fresh Berries: Add a fresh and tart contrast by serving the ice cream with strawberries or raspberries.
- Presentation Tips: Serve in waffle cones or bowls with an extra sprinkle of crushed cookies for a visually appealing treat (Encyclopedia Britannica).
Common Mistakes and How to Avoid Them
Even seasoned home chefs can encounter some challenges when making ice cream. Here’s how to avoid common pitfalls:
- Over-churning the Ice Cream: This can lead to a dense, icy texture. Stop churning once the mixture reaches a soft-serve consistency.
- Uneven Cookie Distribution: To ensure even distribution of cookies, fold them in gently at the very end of the churning process.
- Too-Hard or Too-Soft Ice Cream: Make sure to freeze the ice cream for the recommended time. If it’s too hard, let it sit at room temperature for a few minutes before scooping (Serious Eats) (Recipe Girl).
FAQ Section
Can I Make Cookies ‘n Cream Ice Cream Without an Ice Cream Maker?
Yes, you can! Simply whip the cream until it forms stiff peaks, then fold in the sweetened condensed milk and vanilla extract. Add the crushed cookies and freeze until firm (Recipe Girl).
What Are the Best Types of Cookies to Use?
While Oreos are the classic choice, feel free to experiment with other chocolate sandwich cookies or even homemade cookies for a unique twist.
How Long Can Homemade Ice Cream Be Stored?
Homemade ice cream can be stored in the freezer for up to two weeks. Be sure to keep it in an airtight container to prevent ice crystals from forming.
What’s the Difference Between Using Freshly Made vs. Store-Bought Cookies?
Freshly made cookies can add a more personalized and potentially softer texture, while store-bought cookies like Oreos offer consistent crunch and flavor.
Can I Use Flavored Cookies to Create a Twist on the Traditional Recipe?
Absolutely! Flavored cookies like mint or peanut butter can add a new dimension to the traditional Cookies ‘n Cream flavor.
Is It Possible to Make This Recipe Without Eggs?
Yes, you can create an egg-free version by using a cornstarch-thickened base or opting for a no-churn method (Serious Eats) (Recipe Girl).
Conclusion and Final Thoughts
Cookies ‘n Cream Ice Cream is a universally loved flavor that is surprisingly simple to make at home. Whether you stick to the classic recipe or experiment with different variations, the result is sure to be a hit with everyone. So why not give it a try? With just a few ingredients and some basic techniques, you can create a dessert that’s not only delicious but also customizable to your tastes. Enjoy the process, and most importantly, enjoy the ice cream!