
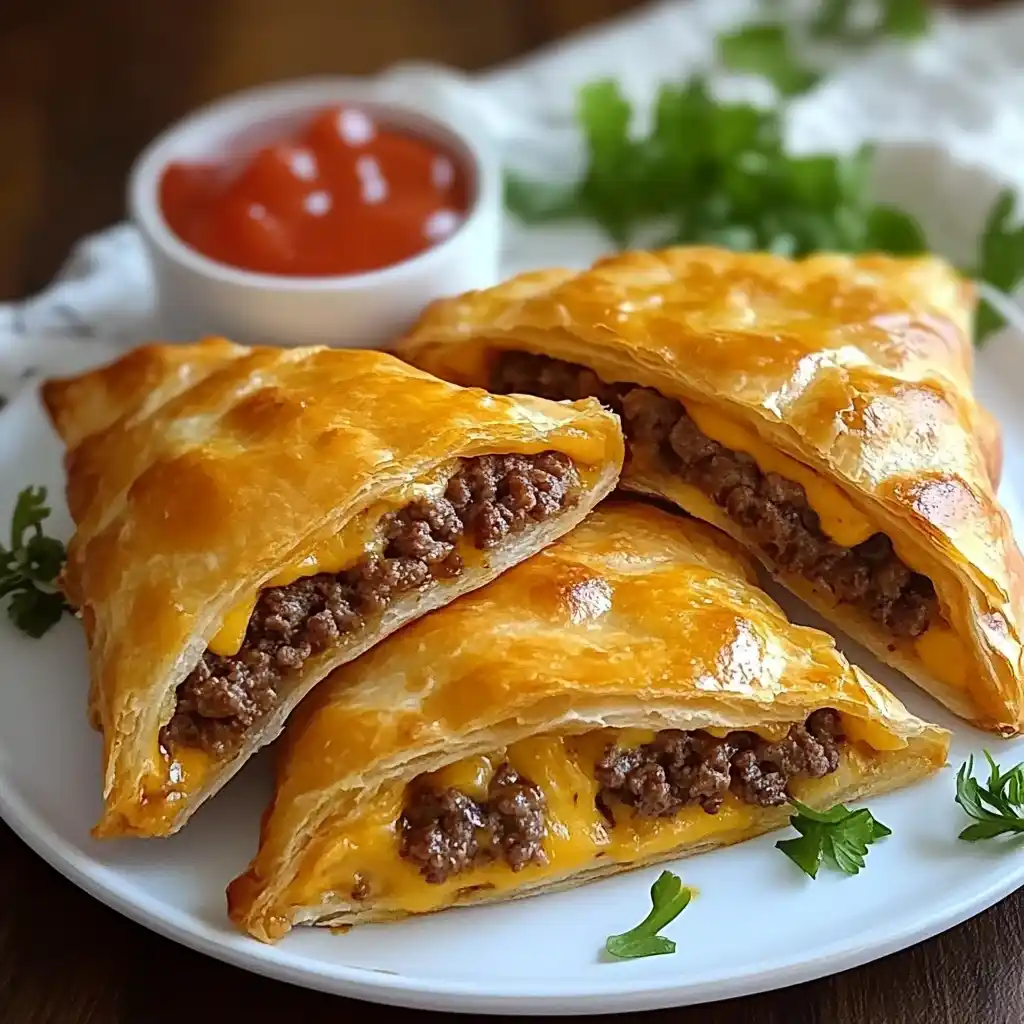
Cheeseburger pockets are one of those genius ideas that combine all the best parts of a classic cheeseburger—meat, cheese, pickles, and a soft bun—into one portable, easy-to-make dish. Imagine biting into a crispy, golden pastry and discovering all the mouth-watering flavors of a cheeseburger inside. It’s like your favorite fast food, but better because it’s homemade, customizable, and fun to make!
Essential Ingredients for Cheeseburger Pockets
Before you get started, here’s what you’ll need to make these delicious little bites.
- Ground Beef: The traditional choice is lean ground beef, but you can also use turkey, chicken, or even plant-based options for a vegetarian or vegan version.
- Cheese: American cheese is classic, but you could also use cheddar, mozzarella, or any cheese that melts well.
- Dough: You can use store-bought pizza dough, puff pastry, or even biscuit dough if you want a quicker, fluffier result.
- Toppings: Just like a cheeseburger, you can add onions, pickles, mustard, ketchup, or even lettuce for extra flavor. Get creative!
- Seasonings: Garlic powder, onion powder, salt, and pepper are key to adding flavor to your ground beef.
How to Make Cheeseburger Pockets
Making cheeseburger pockets is easy and fun, and it’s a perfect way to enjoy all the delicious flavors of a cheeseburger in a handheld, portable form. Whether you’re looking for a quick dinner, a snack for a party, or just something different, these cheeseburger pockets are a great choice. Here’s how to make them step-by-step:
Ingredients:
- 1 lb ground beef (you can also use ground turkey or chicken)
- 1/2 onion, finely chopped
- 1 cup shredded cheese (cheddar, American, or a mix)
- 1/4 cup ketchup
- 1/4 cup mustard (optional)
- Salt and pepper, to taste
- 1 package of pizza dough (or use puff pastry, crescent roll dough, or biscuit dough if you prefer)
- Olive oil (for frying or brushing on dough)
- Pickles (optional, for extra crunch)
Instructions:
Cook the Beef: Start by cooking the ground beef in a skillet over medium heat. Break up the meat with a spoon and cook until browned, about 6-7 minutes. Add the finely chopped onions and cook for another 2-3 minutes until they become soft and translucent. Season with salt and pepper to taste.
Add Ketchup and Mustard: Once the beef and onions are cooked, stir in the ketchup and mustard (if using). This will give your filling the tangy flavor of a traditional cheeseburger. Stir to combine and let the mixture simmer for 2-3 minutes to meld the flavors.
Prepare the Dough: While the beef mixture cools slightly, roll out your pizza dough on a lightly floured surface. If you’re using store-bought dough, you can usually find it in rounds or rectangles. Cut it into circles (about 4-6 inches in diameter), or squares, depending on how you want to shape your pockets.

Assemble the Pockets: Spoon a generous amount of the beef mixture into the center of each dough piece. Top with a small handful of shredded cheese and any optional toppings you like, such as pickles or extra onions. Be careful not to overfill the dough, or it may burst open while cooking.
Seal the Pockets: Fold the dough over the filling to create a pocket. Pinch the edges together tightly to seal. You can use a fork to crimp the edges and make them look extra neat.
Cook the Pockets: You have two options for cooking your cheeseburger pockets:
Baking: Preheat your oven to 375°F (190°C). Place the pockets on a baking sheet lined with parchment paper. If you want a golden, crispy finish, brush the tops of the pockets with a little olive oil or melted butter. Bake for 15-20 minutes, or until the pockets are golden brown and puffed up.
Frying: Heat a couple of tablespoons of olive oil in a frying pan over medium heat. Carefully place the pockets in the pan and cook them for 3-4 minutes on each side, or until golden brown and crispy. Be sure not to crowd the pan, and flip carefully to avoid spilling the filling.
Serve and Enjoy! Once cooked, let your cheeseburger pockets cool for a few minutes. Serve them with ketchup, mustard, or any dipping sauce you like. They’re best enjoyed fresh out of the oven or pan but can be stored in an airtight container for a few days.
Tips for Perfect Cheeseburger Pockets:
For a Crispy Finish: Brushing the dough with egg wash or olive oil before baking will give your pockets a beautifully crisp and golden crust.
Don’t Overfill: It’s tempting to add a lot of filling, but too much can cause the dough to break open. A small spoonful of filling per pocket is plenty.
Customize Your Toppings: Feel free to get creative with your fillings! Try adding bacon bits, sautéed mushrooms, or jalapeños for an extra kick.
Cheeseburger Pocket Variations to Try
One of the best things about cheeseburger pockets is how versatile they are. You can mix things up with different ingredients or cooking methods. Here are some ideas to inspire you:
- Classic Cheeseburger Pockets: Just ground beef, cheddar cheese, pickles, onions, and a little ketchup or mustard. It’s as simple and delicious as it gets.
- Vegetarian or Vegan Cheeseburger Pockets: Use plant-based ground meat (like Beyond Meat) and vegan cheese for a meat-free version. You can still have all the flavor and satisfaction without the animal products.
- Low-Carb Cheeseburger Pockets: For a keto-friendly option, use lettuce wraps or gluten-free dough instead of traditional pastry dough.
- Cheeseburger Pockets with a Twist: Add bacon, mushrooms, jalapeños, or even barbecue sauce for a fun twist on the classic flavors.
Best Cooking Methods: Baking vs. Frying
When it comes to cooking cheeseburger pockets, you’ve got two main options: baking or frying. Both methods have their pros and cons.
- Baking: Baking is a healthier option since you don’t need to use any oil. Plus, it’s easier to control the temperature and avoid overcooking. If you prefer a crispy finish, brush the tops of the pockets with a little egg wash before baking.
- Frying: Frying gives you that irresistible crispy texture and rich flavor, but it’s a bit more work and adds some extra calories. If you choose to fry, make sure your oil is at the right temperature—too hot, and the pockets will burn; too cold, and they’ll absorb too much oil.
Creative Ways to Serve Cheeseburger Pockets
Cheeseburger pockets aren’t just for lunch or dinner—they can be served in so many fun and creative ways.
- Party Appetizer: Serve them as finger food at your next gathering. Try different dips like ranch dressing, ketchup, mustard, or even a spicy barbecue sauce.
- Side Dishes: Pair them with classic sides like crispy fries, a fresh salad, or even sweet potato fries for a wholesome meal.
- Meal Prep: Cheeseburger pockets are perfect for meal prep. You can freeze them and reheat them later for a quick and tasty meal.
Common Mistakes to Avoid
To make sure your cheeseburger pockets come out perfect every time, here are a few common mistakes to watch out for:
- Overfilling: It’s tempting to load up your pockets with tons of filling, but be careful. Overstuffing can cause the dough to tear, or the pockets won’t cook properly.
- Not Sealing Properly: If your pockets aren’t sealed well, the filling might leak out during cooking. Make sure the edges are tightly pinched together.
- Using Low-Quality Dough: The dough can make or break your cheeseburger pocket. Make sure to use a good quality dough that bakes up golden and crispy. You can always make your own dough if you want a more gourmet touch.
FAQs About Cheeseburger Pockets
- How long do cheeseburger pockets last in the fridge?
Cheeseburger pockets will last about 3-4 days in the fridge if stored in an airtight container. - Can I make cheeseburger pockets in advance and freeze them?
Yes! You can freeze uncooked cheeseburger pockets for up to 3 months. Just bake or fry them directly from frozen. - What is the best way to store leftover cheeseburger pockets?
Store them in an airtight container in the fridge. Reheat them in the oven for best results. - Can I use other types of cheese for cheeseburger pockets?
Absolutely! Experiment with different cheeses like mozzarella, Swiss, or pepper jack to mix things up. - What are some fun variations I can try with cheeseburger pockets?
Add fun ingredients like bacon, mushrooms, jalapeños, or even a fried egg to elevate your cheeseburger pockets.
Conclusion
Cheeseburger pockets are a fun, easy, and incredibly delicious twist on the classic cheeseburger. Whether you’re making them for a quick weeknight dinner, a party appetizer, or a meal prep option, they’re sure to be a hit. Plus, they’re highly customizable, so you can tweak the ingredients to match your tastes and dietary preferences.
Print
Cheeseburger Pockets
- Total Time: 45 minutes
Description
Cheeseburger pockets are a fun twist on the classic cheeseburger, filled with seasoned ground beef, melted cheese, and your favorite toppings, all wrapped in dough. Bake or fry for a crispy, golden snack that’s perfect for any occasion.
Ingredients
- 1 lb ground beef or turkey
- ½ teaspoon salt
- ½ teaspoon black pepper
- 1 tablespoon minced dried onion
- 2 tablespoon mustard
- 2 tablespoon ketchup
- 4 oz American cheese
- 8 oz package Pillsbury Crescent Rolls
- 1 egg whisked
- 1 tablespoon sesame seeds
Instructions
-
Preheat oven to 375ºF.
-
In a medium skillet over medium-high heat, add ground beef, salt, pepper and dried onion. Crumble and cook until no longer pink. Drain or blot any excess grease. Add the mustard, ketchup and cheese, stirring until melted.
-
Unroll the crescent roll dough and press the seams together. Cut into 6 even rectangles. For each pocket, evenly divide the filling, placing on one side of each dough, then bring the dough over the filling and press the seams together. Brush with egg wash and sprinkle with sesame seeds.
-
Bake 20-25 minutes or until the dough is golden brown.
- Prep Time: 15minutes
- Cook Time: 30minutes
- Category: Main Dish
- Cuisine: American
Nutrition
- Calories: 386kcal
Keywords: Cheeseburger Pockets